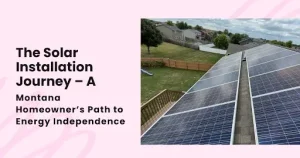
Imagine waking up in your cozy home, knowing that the energy powering your morning coffee comes directly from the sun. It’s not just about saving money. It’s about making a lasting impact on the environment while enjoying the benefits of clean, renewable energy. Lower electricity bills, greater energy independence, and a smaller environmental footprint are all compelling reasons why you should consider going solar. But how do you get from deciding to go solar to reaping the benefits? This blog will walk you through the solar installation process step by step, making it clear and straightforward.
The Solar Installation Process: Step-by-Step
Site Assessment and Energy Audit
The first step in the solar installation process involves a thorough site assessment. A solar expert visits your home, whether in Billings or Bozeman, to evaluate factors such as roof orientation, shading, and available space. This step ensures that your home is suitable for solar panels and determines the best system size to meet your energy needs.
System Design and Permitting
Once the site assessment is complete, the next step is designing your solar panel system. This includes selecting the right type and number of panels, as well as determining the best placement on your roof to maximize efficiency. After finalizing the design, the installer will handle all necessary permits, ensuring compliance with local Montana regulations.
Solar Panel Installation
With permits in hand, the installation begins. The solar installation procedure involves mounting the panels securely to your roof. Installers also set up the racking system, which holds the panels in place. The wiring is then connected to allow the energy generated by the panels to flow into your home’s electrical system. This process is typically completed in a day or two, depending on the size of the system.
Inverter Installation
The inverter is a crucial component of the solar energy process steps. It converts the direct current (DC) produced by the panels into alternating current (AC), which powers your home. Inverters can be installed either as a single unit for the entire system or as microinverters attached to each panel.
Connection to the Grid
After the installation of the inverter, your system is connected to the power grid. This allows you to draw power from the grid when your panels aren’t producing enough electricity, such as during the night. It also enables net metering, where excess energy generated by your system is fed back into the grid, earning you credits on your utility bill.
Inspection and Commissioning
Before you can start using your new solar energy system, it must pass a final inspection by local authorities in Montana. This inspection ensures that the installation complies with safety and building codes. Once approved, your system is commissioned, and you can start generating your own solar energy.
Monitoring and Maintenance
Monitoring your system is essential to ensure it operates efficiently. Most solar companies provide online tools or apps that allow you to track your energy production in real time. Regular maintenance, such as cleaning the panels and checking the system’s performance, will help you maximize the benefits of your solar installation process step-by-step.
How Solar Panels Work
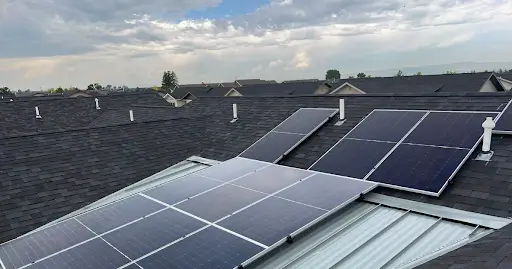
Understanding (how solar panels work) is crucial to appreciating the entire solar energy process. Solar panels capture sunlight and convert it into electricity using the photovoltaic effect. This electricity is then used to power your home, reducing reliance on non-renewable energy sources.
Avoid Common Mistakes People Make When Installing Solar
Installing a solar energy system is a significant investment, and avoiding common pitfalls is crucial to maximizing its benefits. Here are some key mistakes to avoid during the solar installation process:
Purchasing an Overpriced System
One of the most common mistakes homeowners make is overpaying for their solar system. Here’s how to avoid it:
- Do Your Research: Compare prices from multiple solar installation companies to ensure you’re getting a fair deal.
- Understand Incentives: Take advantage of federal, state, and local incentives available in Montana to reduce the overall cost of your system.
- Evaluate System Efficiency: Sometimes a cheaper system with high efficiency can be a better investment than an expensive one with lower efficiency.
Not Making a Checklist of Components
Overlooking necessary components can lead to delays and additional costs. To avoid this:
- Create a Comprehensive Checklist: List all essential components, including solar panels, inverters, mounting hardware, and monitoring systems.
- Double-Check with Your Installer: Ensure your installer has all the necessary components before the installation begins to avoid any last-minute surprises.
- Plan for Future Upgrades: Consider including components that allow for future expansions or upgrades to your solar system.
Not Knowing About System Dimensions
Understanding the physical dimensions of your solar system is crucial for a smooth installation process. Here’s what you need to consider:
- Roof Space Requirements: Ensure your roof has enough space to accommodate the number of panels required for your energy needs.
- System Layout: Work with your installer to design a layout that maximizes efficiency while fitting within your available space.
- Consider Aesthetic Impact: Think about how the system will look on your home and if it aligns with your aesthetic preferences, especially in visible areas.
By being aware of these common mistakes and taking steps to avoid them, you can ensure a successful solar installation process and enjoy the full benefits of solar energy in your Montana home.
Embrace Solar Energy
Going solar is more than just a trend—it’s a smart investment in your future. With the detailed steps outlined in this blog, you now have a clear understanding of the solar installation procedure. Whether you’re in Billings, Bozeman, or elsewhere in Montana, the process is straightforward and rewarding. By choosing to go solar, you’re not only cutting down on energy costs but also contributing to a cleaner, greener environment.
So, why wait?
Start your journey towards energy independence today by embracing the solar installation process step-by-step.
Frequently Asked Questions
How Does a Solar Panel System Work Step by Step?
A solar panel system works by capturing sunlight through solar panels, converting it into DC electricity, and then using an inverter to convert it to AC electricity for your home. Excess energy is sent back to the grid, and you can draw from the grid when needed.
How to Calculate or Design a Solar PV System: A Complete Guide?
Designing a solar PV system involves calculating your energy needs, determining the appropriate system size, choosing the right panels, and planning the installation layout. This process ensures that your system will meet your energy requirements efficiently.
At What Point Do Solar Panels Pay for Themselves?
Solar panels typically pay for themselves within 5 to 10 years, depending on factors like local energy costs, available incentives, and the efficiency of your system. In locations like Montana, with ample sunlight, the payback period can be even shorter.