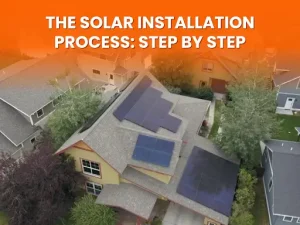
Switching to solar power is a great way to save on energy costs and support a cleaner environment. But understanding the solar installation process is essential to making an informed decision. This guide explains each step. It clarifies what homeowners can expect during a solar installation in Billings.

1. Initial Consultation and Site Assessment
The first step in the solar installation process is a consultation with a solar provider. This step helps identify your energy needs, budget, and expectations. Next, an expert visits your home for a site assessment. They check your roof, the sunlight on your property, and the best spot for solar panels.
This site assessment is a good time to discuss roof coverage and insurance in Billings MT. Including your solar panels in your homeowner’s policy protects your investment. Now, addressing concerns about a roof damage claim will ensure peace of mind.
2. Designing the System
After the assessment, the next phase is designing a system customized to your energy needs and roof layout. The design team takes measurements and crafts a plan that maximizes energy production while ensuring your home’s aesthetics are not compromised. This stage also involves acquiring permits and ensuring compliance with local regulations.
A well-planned solar installation procedure ensures efficiency and optimal performance. The blueprint covers panel placement, the number of panels required, and any potential shading issues.
3. Acquiring Permits and Approvals
Solar installations must comply with local regulations and codes. Your solar provider will handle the permit process. This step can take a few weeks as it involves approvals from local building and electrical departments. Obtaining these permits ensures your installation is safe and up to standard.
The approval stage may seem lengthy, but it is essential for a successful solar installation process. Once approved, installation team schedules a start date.
| Tip: Ensure Solar contractor has experience in handling permits efficiently. This can speed up the process and reduce potential delays. |
4. Installation Day
Installation day is when the visible work begins. The team arrives with all necessary equipment and materials. Here is how the solar installation procedure typically unfolds:
-
Mount Installation:
The foundation for the solar panels is placed on the roof. These mounts ensure that the panels stay secure and angled for maximum sunlight exposure.
-
Panel Placement:
Once the mounts are in place, the panels are carefully installed. This part of the process requires precision to optimize energy capture.
-
Electrical Wiring:
The team connects the solar panels to the inverter through a series of electrical wiring. This inverter is responsible for converting solar energy into usable electricity for your home.
The installation process usually takes one to three days, depending on the size of your solar system. After this stage, initial testing is conducted to confirm that everything works as intended.
5. System Inspection and Approval
Before the system goes live, a local inspector reviews the installation to ensure it meets safety and regulatory standards. This inspection step is crucial as it verifies that the solar installation process has been done correctly. The inspector checks wiring, mounting, and overall setup to ensure your system is safe and functional.
Once approved, your utility company may also conduct an inspection and set up a net meter. This meter tracks your energy usage and any excess power your panels send back to the grid, allowing you to earn credits on your energy bill.
6. System Activation
The final step is system activation. After all inspections are passed, your solar provider will activate your system, officially connecting it to the grid. You will start generating electricity and enjoying the benefits of solar energy right away.
| Tip: Keep track of your energy production using the monitoring app provided by your installer. This will help you maximize energy usage and identify any potential issues early on. |

7. Common Issues and Insurance Concerns
While the solar installation procedure is generally smooth, homeowners should be aware of potential roofing issues. Installing panels requires drilling into the roof, which can sometimes lead to damage. Ensure your solar contractor in Billings is experienced and follows best practices to minimize risks. Discussing coverage with your insurer and knowing how to file an insurance claim for roof damage can protect your home if problems arise.
Conclusion
Understanding the solar installation process helps make your transition to renewable energy smooth and worry-free. Each step, from consultation to activation, is vital. It leads to a successful solar setup that benefits your home for years. Ready to take the first step toward cleaner energy and cost savings? Contact Solar Installers in Billings today for a comprehensive consultation and quote.
Ready to install or repair solar panels in Billings, MT and start saving on energy bills? Reach out to Wegner Roofing and Solar for a consultation today!
FAQs
How to calculate or design a solar PV system a complete guide?
Designing involves assessing energy needs, panel output, and roof space, followed by planning the layout for maximum efficiency.
At what point do solar panels pay for themselves?
Solar panels typically pay for themselves within 6-10 years, depending on energy savings and initial costs.